Company
You can see your Company by clicking in the Account button on the navigation panel, and then on Company.
The Company page is where you edit your Company details, manage your team, set up Security, CSV export options that will be adopted inside Viur.
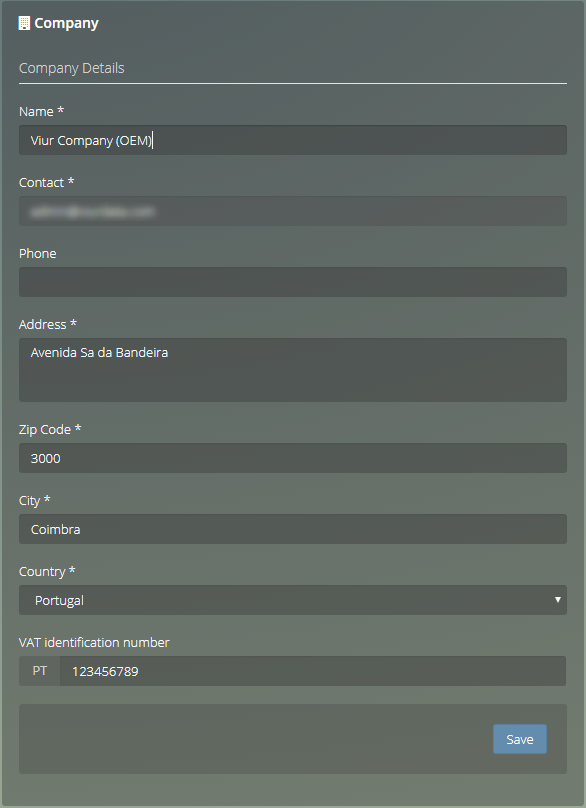
Company Details #
This is where you set up your Company details.
- Name - Company's name for the billing receipt.
- Contact - Contact is your default registration e-mail and cannot be changed.
- Phone - Phone number for the billing receipt.
- Address - Address for the billing receipt.
- Zip Code - Zip code for the billing receipt.
- City - City for the billing receipt.
- Country - Country for the billing receipt.
Note: Don't forget to click the save button right under those fields.
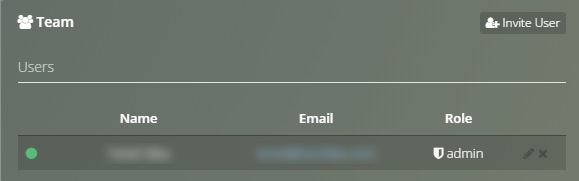
Users (Team Management) #
You can invite new members to the team. The invited user will receive an E-mail to complete the registry.
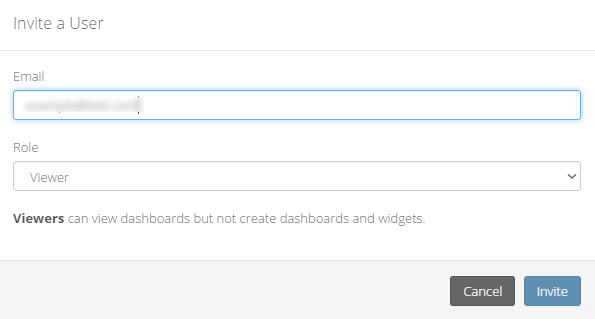
To add a user click on the Add User button.
To add a User you have to insert:
- E-mail - E-mail of the user.
- Role - Choose the permission level of the user.
In the list of active users click to edit a specific user or click to remove it.
Permission Levels #
- Admins - can create dashboards and widgets and also manage users, Data Sources and the account subscription.
- Analysts - can create dashboards and widgets.
- Viewers - can view dashboards but not create dashboards and widgets.
To send the invitation click on Invite.
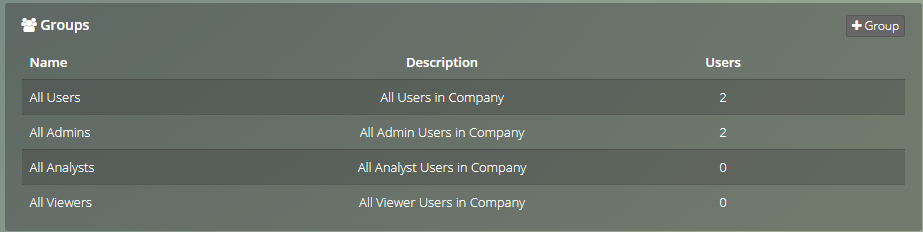
Groups #
By adding Users to a Group you can create Alerts, Reports and add permissions to multiple Users much more quickly, instead of adding one by one. There are 4 Groups by default that cannot be deleted:
- All Users
- All Admins
- All Analysts
- All Viewers
Automatically depending on the type of User he is both part of one or of these Default Groups (All Admins, All Analysts, All Viewers) plus the All Users.
Any User can by part of multiple Groups.
To create a Group you just need to insert:
- Name: Name of the Group
- Description: Optional description to help you understand what this Group is about.
- Users: You need to select from the a User from this list and then click Add, multiple Users can be part of this Group and other groups you create.

To remove someone from the Group you just need to click on the .
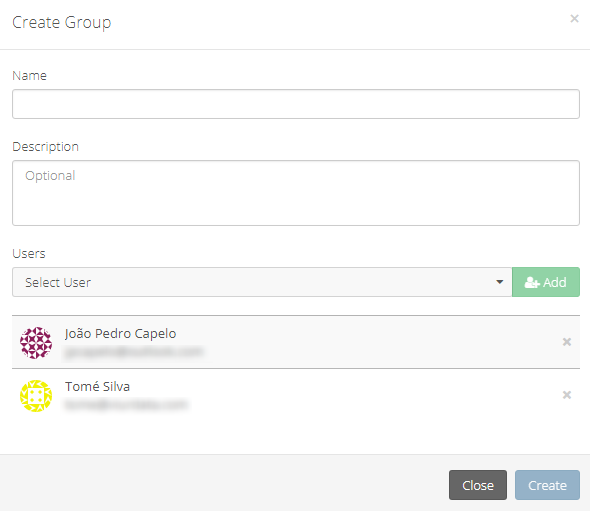
You can delete or edit exiting Groups by clicking or respectively.
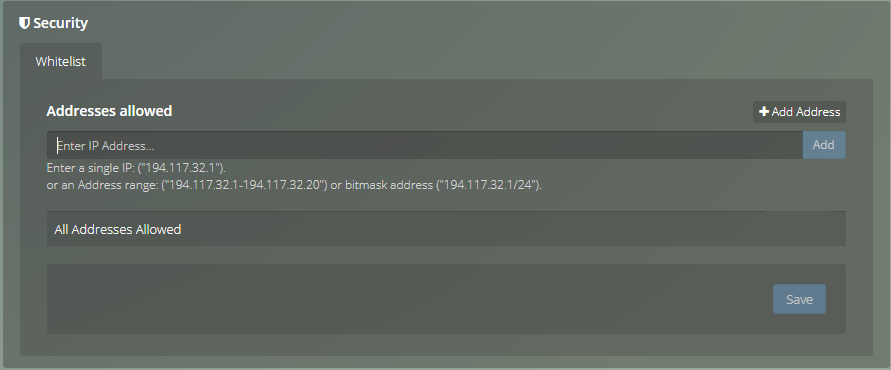
Security #
Security allows to define what IP are whitelisted for access, it restricts your account to logins from an IP or range of IP Addresses defined here.
To add an IP you need to click Add Address and then
- Enter a single IP: ("194.117.32.1")
- or an Address range: ("194.117.32.1-194.117.32.20") or bitmask address ("194.117.32.1/24")
If the IP is correct the Add button becomes available.
Note
If your current IP does not match or not inside the range added, your current IP is automatically added.
Remove them all to allow all addresses.
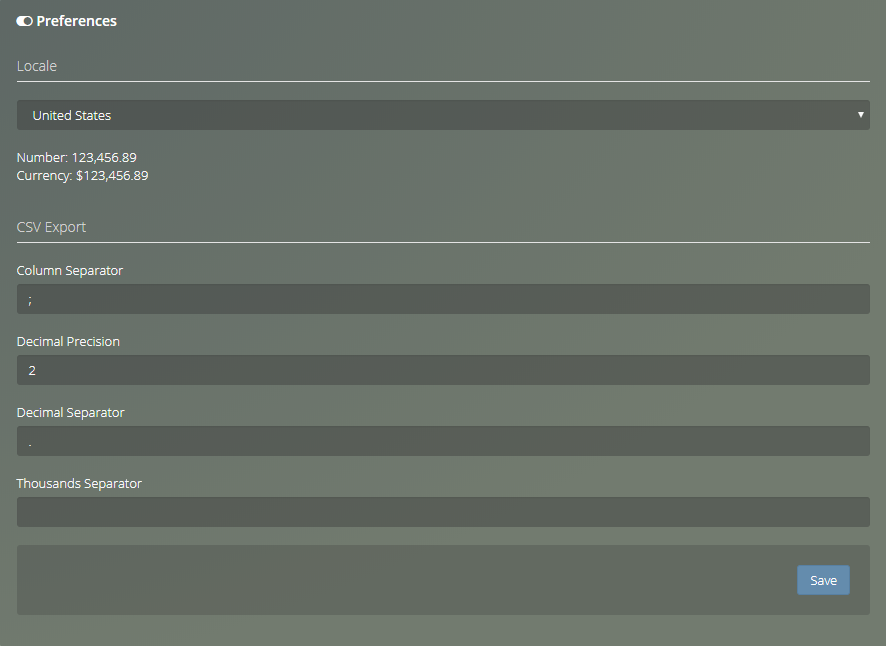
Preferences #
You can choose the global settings to be used inside Viur:
- The locale changes the number formatting and currency used.
- CSV Options defines the format of the exported CSV files.
Note
Only an Admin can access the Company page and change the Preferences.
In the Preferences panel you can set settings that affect the account globally.
Choosing a Locale will affect how the numeric and currency values are shown in charts.
By default all accounts are set to the United States locale.
In the CSV Exports you can define how Viur exported CSV files will look like:
- Column Separator - The symbol to separate the data ( typically , or ; )
- Decimal Precision - The number of decimal digits to include
- Decimal Separator - The separator symbol to indicate the decimal place ( typically . or , )
- Thousands Separator - The separator symbol to indicate thousands ( typically . or , )
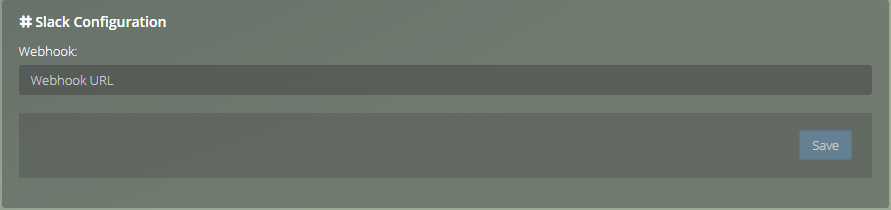
Slack #
By integrating Slack with Viur allows to send Viur's Alerts and Reports to a Slack @user or #channel.
You can define the Slack Webhook here in the Company Page.
Note
You also need to configure a Slack Account so Viur can communicate with Slack.