Use Variables in Widgets (SQL)
When creating or editing a Widget you can add them Variables to help you on your analysis.
To add Variables in an existing Widget click on Widgets (Charts & Metrics) on the navigation bar and then choose Widgets.
After that you will have to click on Edit on the Widget you want to add Variables.
You can also click on Edit of each Widget directly on the dashboard.
Tip
Watch on youtube:
Creating a Text Filter Variable from SQL
You can add Variables without using drag and drop, but instead coding in SQL directly:
Text Input Filter Variable #
To use a Text Input Filter Variable in the code editor simply use the Variables with the curly brackets { }:
{"TableName"."ColumnName" = VariableName}
like this example:
SELECT "Orders"."Ship Country" AS "Country", COUNT("Orders"."OrderID") AS "Orders"
FROM "PUBLIC". "Orders"
WHERE {"Orders"."Ship Country" = Countries}
GROUP BY "Orders"."Ship Country"
ORDER BY COUNT("Orders"."OrderID") DESC
Dropdown Filter Variable #
To use a Dropdown Filter Variable in the code editor simply use the Variables with the curly brackets { }:
{"TableName"."ColumnName" = VariableName}
like the example before:
SELECT "Orders"."Ship Country" AS "Country", COUNT("Orders"."OrderID") AS "Orders"
FROM "PUBLIC". "Orders"
WHERE {"Orders"."Ship Country" = Countries}
GROUP BY "Orders"."Ship Country"
ORDER BY COUNT("Orders"."OrderID") DESC
Date Range Filter Variable #
To use a Date Range Filter Variable in the code editor simply use the Variables with the curly brackets { }:
BETWEEN {VariableName.start} AND {VariableName.end}
like this example:
SELECT date_trunc('YEAR',  "Orders"."Order Date") AS "Order Date", COUNT("Orders"."OrderID") AS "OrderID"
FROM "PUBLIC". "Orders"
WHERE CAST("Orders"."Order Date" AS DATE) BETWEEN {OrdersDate.start} AND {OrdersDate.end}
GROUP BY date_trunc('YEAR',  "Orders"."Order Date")
ORDER BY date_trunc('YEAR',  "Orders"."Order Date") ASC
Important Note
The Date Range Filter only works with Dates, and not Date Time. Use the CAST function to ensure that the query result has the type Date.
Dates Ranges are inclusive so the interval BETWEEN 01-01-2015 AND 03-01-2015 actually returns 01-01-2015, 02-01-2015 and 03-01-2015.
Date Aggregation Variable #
To use Variables in the code editor simply use the Variables with the curly brackets { }.
To use a Date Aggregation in SQL mode, use:
{"TableName"."ColumnName" by aggregation}
on a date type column, like this:
SELECT {"Orders"."Order Date" by aggregation} AS "Order Date", COUNT("Orders"."OrderID") AS "OrderID"
FROM "PUBLIC". "Orders"
GROUP BY {"Orders"."Order Date" by aggregation}
ORDER BY {"Orders"."Order Date" by aggregation} ASC
SQL mode Tips #
These are some examples that can help you creating Widgets in SQL mode.
You can set on your Dropdown Filters the default values when the Variable is not set or not assigned to the dashboard.
For a single value:
WHERE {"Employees"."City" = Countries:'Tacoma'}
For multiple values:
WHERE {"Employees"."City" = Countries:'Tacoma','Redmond','Kirkland'}
You can also set on your Dropdown Range Filter a default date when the Variable is not set or not assigned to the dashboard:
WHERE CAST("Orders"."Order Date" AS DATE) BETWEEN {OrdersDate.start:'2017-01-01'} AND {OrdersDate.end:'2019-01-01'}
You can set a default value on Date Aggregation Filter, here is a complete list:
{"TableName"."ColumnName" by aggregation:minute}
{"TableName"."ColumnName" by aggregation:hour}
{"TableName"."ColumnName" by aggregation:day}
{"TableName"."ColumnName" by aggregation:week}
{"TableName"."ColumnName" by aggregation:month}
{"TableName"."ColumnName" by aggregation:quarter}
{"TableName"."ColumnName" by aggregation:year}
If you insert a valid SQL query it can be sent to your server indiscriminately, as long as the syntax is correct for your database system, so you have freedom when creating you SQL queries.
WHERE CAST("Orders"."Order Date" AS DATE) BETWEEN {OrdersDate.start:'2019-01-01'} AND {OrdersDate.end:cast(now() as date)}
Note
The default value must be valid SQL in the database system being used.
Dynamic filters in SQL mode #
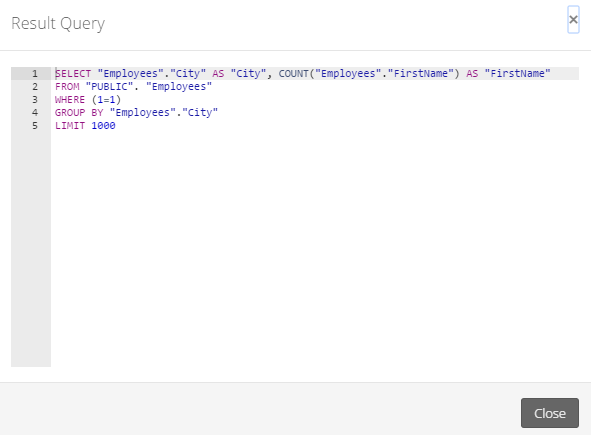
In SQL mode you can see the result query that is sent to the server by clicking on "Show Results Query"

This will allow you to check how the query is sent to the server after it's processed by Viur.
