Embed (JWT Web Tokens + embed.js)
This type of Embed allows you to integrate dashboards or just charts/widgets in your site/portal using
JWT Web Tokens and an embed script (that takes care of all the logic to setup and the
embed technology to use - HTML <iframe> Tag or Web
Components)
in a very secure fashion and have complete control over:
- For how long the Embed of a Dashboard or Chart/Widget can be accessed using the generated token
- The default values for the Variables
- What Variables the user can manipulate
- Apply custom CSS and change other options
Note
Currently Embed with JWT tokens and embed.js is only available in Viur private instances
1 - Grab the Embed Secret from the Company page
Note
You will need to have a role of admin on the company to access the Embed Secret.

Waning
As an admin you can request the embed secret to be reset. This will immediately invalidate all generated tokens that were encoded with the previous secret.
2 - Make a Dashboard or Chart/Widget Embeddable
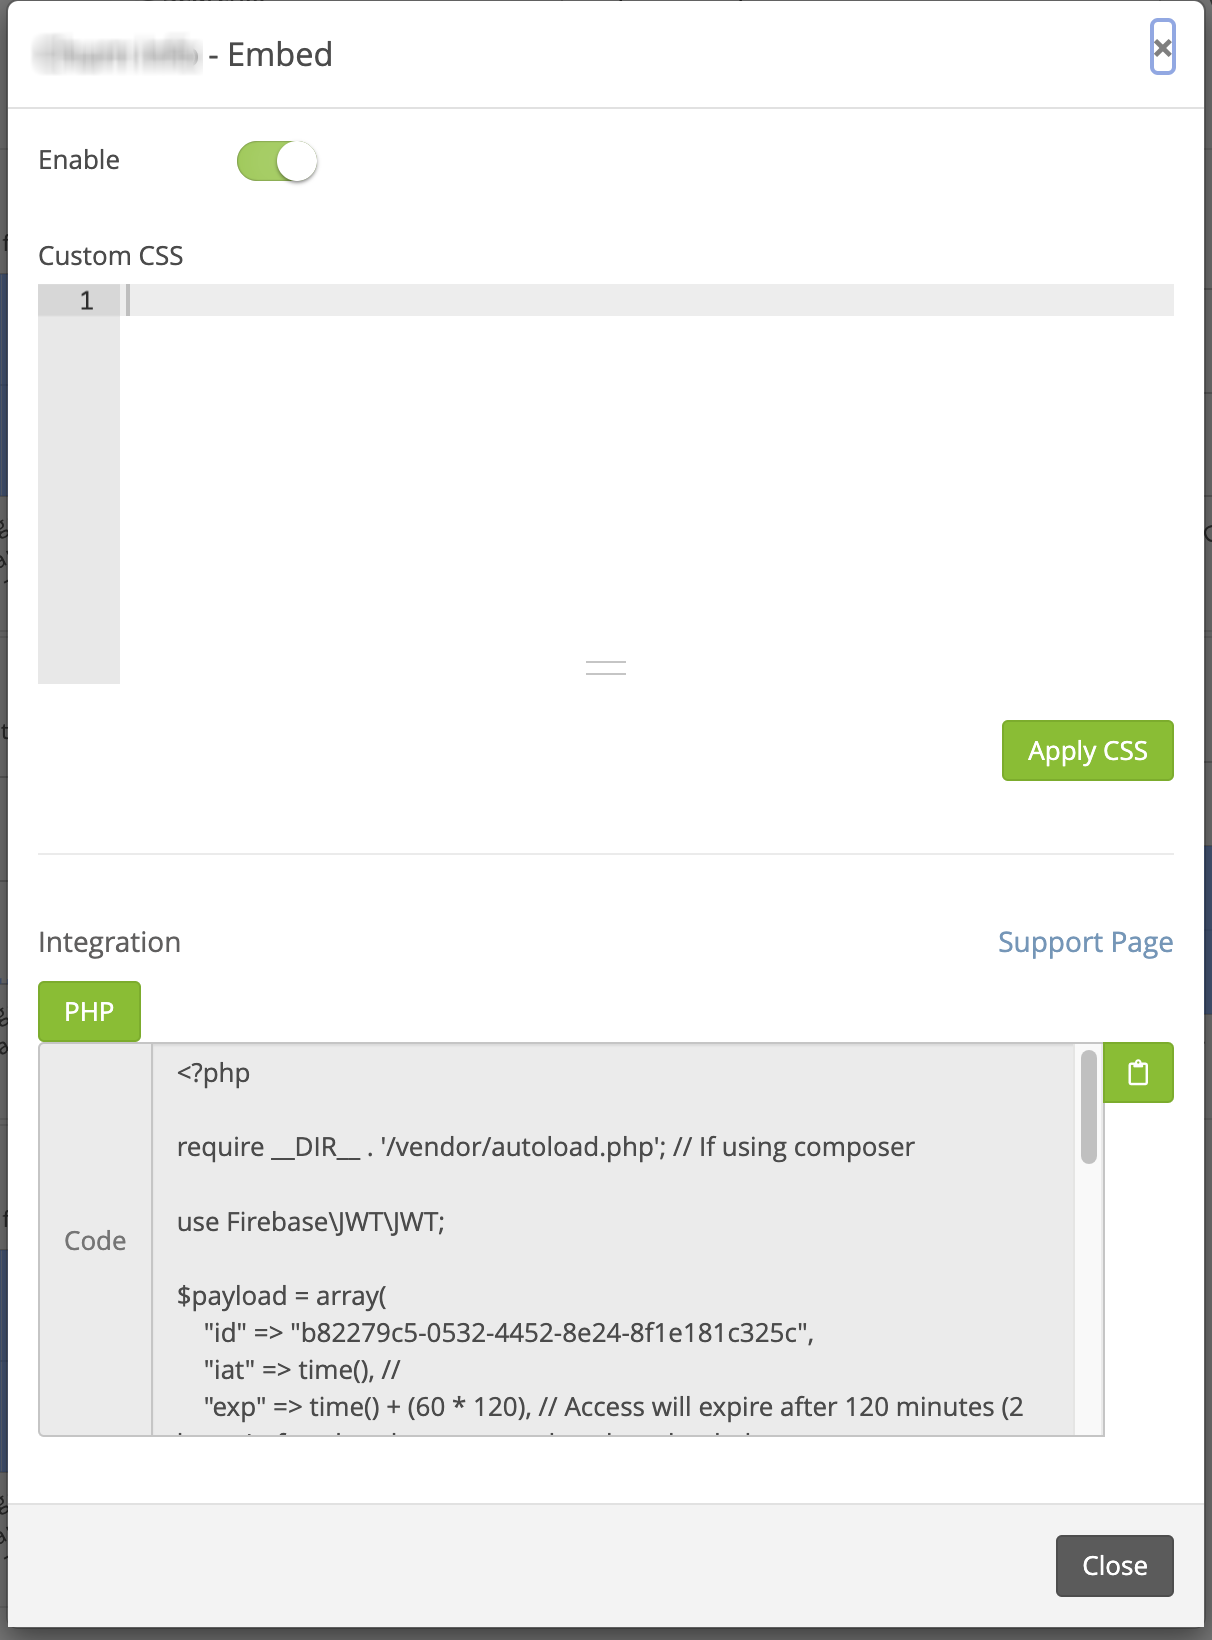
2.1 - While on a dashboard or a widget click on the embed icon

2.2 - Click on Enable

2.3 - (Optional) Add custom CSS and click Apply CSS
For example:
body{
  background-color: white;
  background-image: none;
}
.filters-box{
  color: red;
  background-color: white;
}
.widget {
  background-color: white;
}
3 - Customize the embed code and apply to your website/portal
PHP Example (using firebase/php-jwt Library)
<?php

require __DIR__ . '/vendor/autoload.php'; // If using composer

use Firebase\JWT\JWT;

$url = "PRIVATE INSTANCE URL"; //Ex. https://myinstance.viurdata.com
$key = "YOUR EMBED SECRET";
$embed = "EMBED ID HERE";

$payload = array(
    "id" => $embed,
    "iat" => time(), //
    "exp" => time() + (60 * 120), // Access will expire after 120 minutes (2 hours) after that the page needs to be reloaded
    "variables" => array(
        "VARIABLE_NAME" => array(
            "enabled" => true, // Can the variable be controlled by the user? (false by default)
            "value" => "value", // Set the variable to a specific value or multiple values with array("value_1", "value_2")
        ),
        "date_range_variable" => array(
            "enabled" => true, // Can the variable be controlled by the user? (false by default)
            "value" => "today", // "today", "yesterday", "this_year", "last_week" ... or array("2020-01-01", "2020-01-31")
        ),
        "hidden_variable" => array(
            "value" => 5 // Will override the fixed value of this hidden/fixed variable
        )
    )
    "options" => array(
      "theme" => array(
        "palette" => array()
      ),
      "css" => ""
    )
);

$jwt = JWT::encode($payload, $key);

echo '<div style="width: 1200px;height: 600px;">
            <script async src="' . $url . '/embed.js?id=' . $embed . '&token=' . $jwt . '
            " type="text/javascript">
            </script>
      </div>';

?>
Other Languages examples will be coming soon. Reach out if you require assistance setting up in other languages.
A list of Libraries to work with JWT Tokens can be found here.
Payload Requirements
A valid JWT payload to be accepted by Viur should include the following claims:
- id (Embed ID): The ID of the Embed to show
- iat (Issued at): The time at which the JWT was issued (time in seconds since the Unix Epoch)
- exp (Expiration time): The expiration time after which the JWT will be expired (time in seconds since the Unix Epoch)
Note
By default Viur will expire a JWT token 24 hours from the issued at claim so the maximum time for exp needs to be below 24 hours from iat.
Optional claims
- variables (Variables): To set the behaviour of all the available variables in the dashboard
Note
By default all available variables in the dashboard or chart/widget will be hidden and disabled. This means a user will not be able to control it and set a new value.
To make a specific variable user controllable you will need to set "enabled" to "true"
The variable object is made of with a property key that is the name of the variable
Set "enabled" to true so the variable is visible (controllable) so other values can be set by the users
Set "value" to specific value(s) - NOTE: The value will always stay the same if the variable is of type
hidden/fixed and/or if "enabled" is set to false or not set (false by default)
```
"variables": {
    "variable_1": {
      "enabled": true,
      "value": "value"
    },
    "variable_2": {
      "enabled": true,
      "value": [
        "value_1",
        "value_2"
      ]
    },
    "date_range_variable": {
      "enabled": true,
      "value": "today"
    },
    "hidden_variable": {
      "value": 5
    }
  }
```
- options (Options): To set custom behaviour/options
css allows to inject custom CSS into the dashboard or chart/widget
Note
Setting the css option will override any CSS set in the embed modal
theme allows customization of the look and feel of the dashboard or chart. Currently you can set the color palette to use in the chart(s) by passing an array of colors.
    "options" => array(
        "theme" => array(
           "palette" => array("#af00a0","#bbbdbf","#ff5900","#ffa51d","#fff200")
        ),
        "css" => "body{
                    background-color: white;
                    background-image: none;
                  }
                  .filters-box{
                    color: red;
                    background-color: white;
                  }
                  .widget {
                    background-color: white;
                  }"
    )